
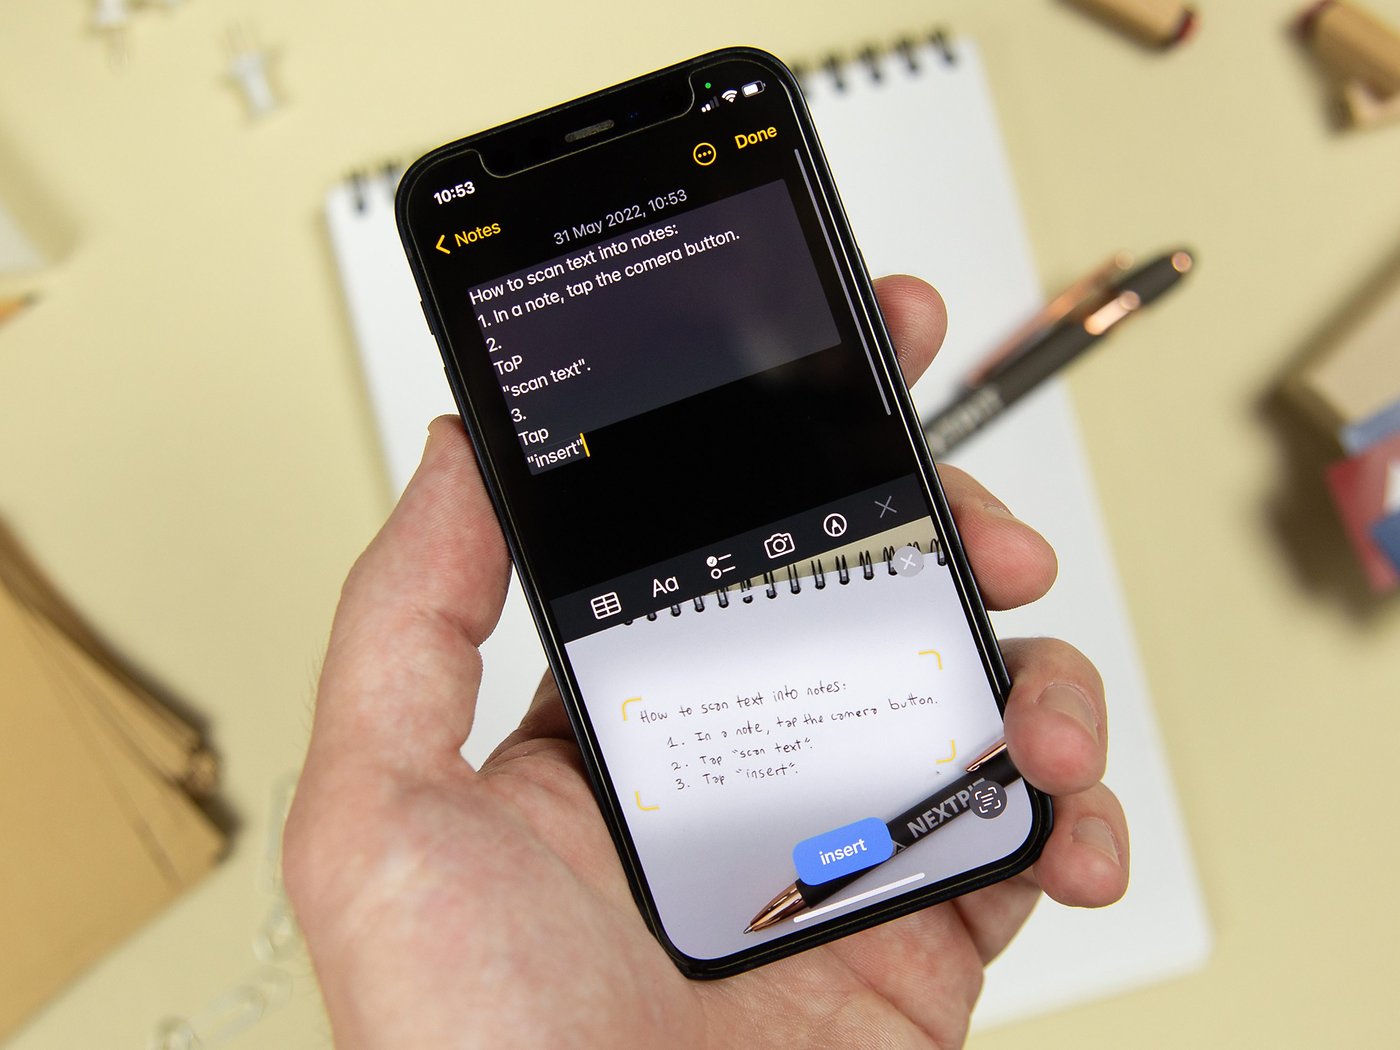
In order to overlook a document using an Apple iPhone, you’ll need to make use of the dereliction Apple Notes app. To start a new scanning design, open the Notes app, valve on the icon to produce a new note and also tap on the camera icon that appears above the keyboard. This action will launch a small sub-menu that provides options for surveying documents and taking prints or videotape.
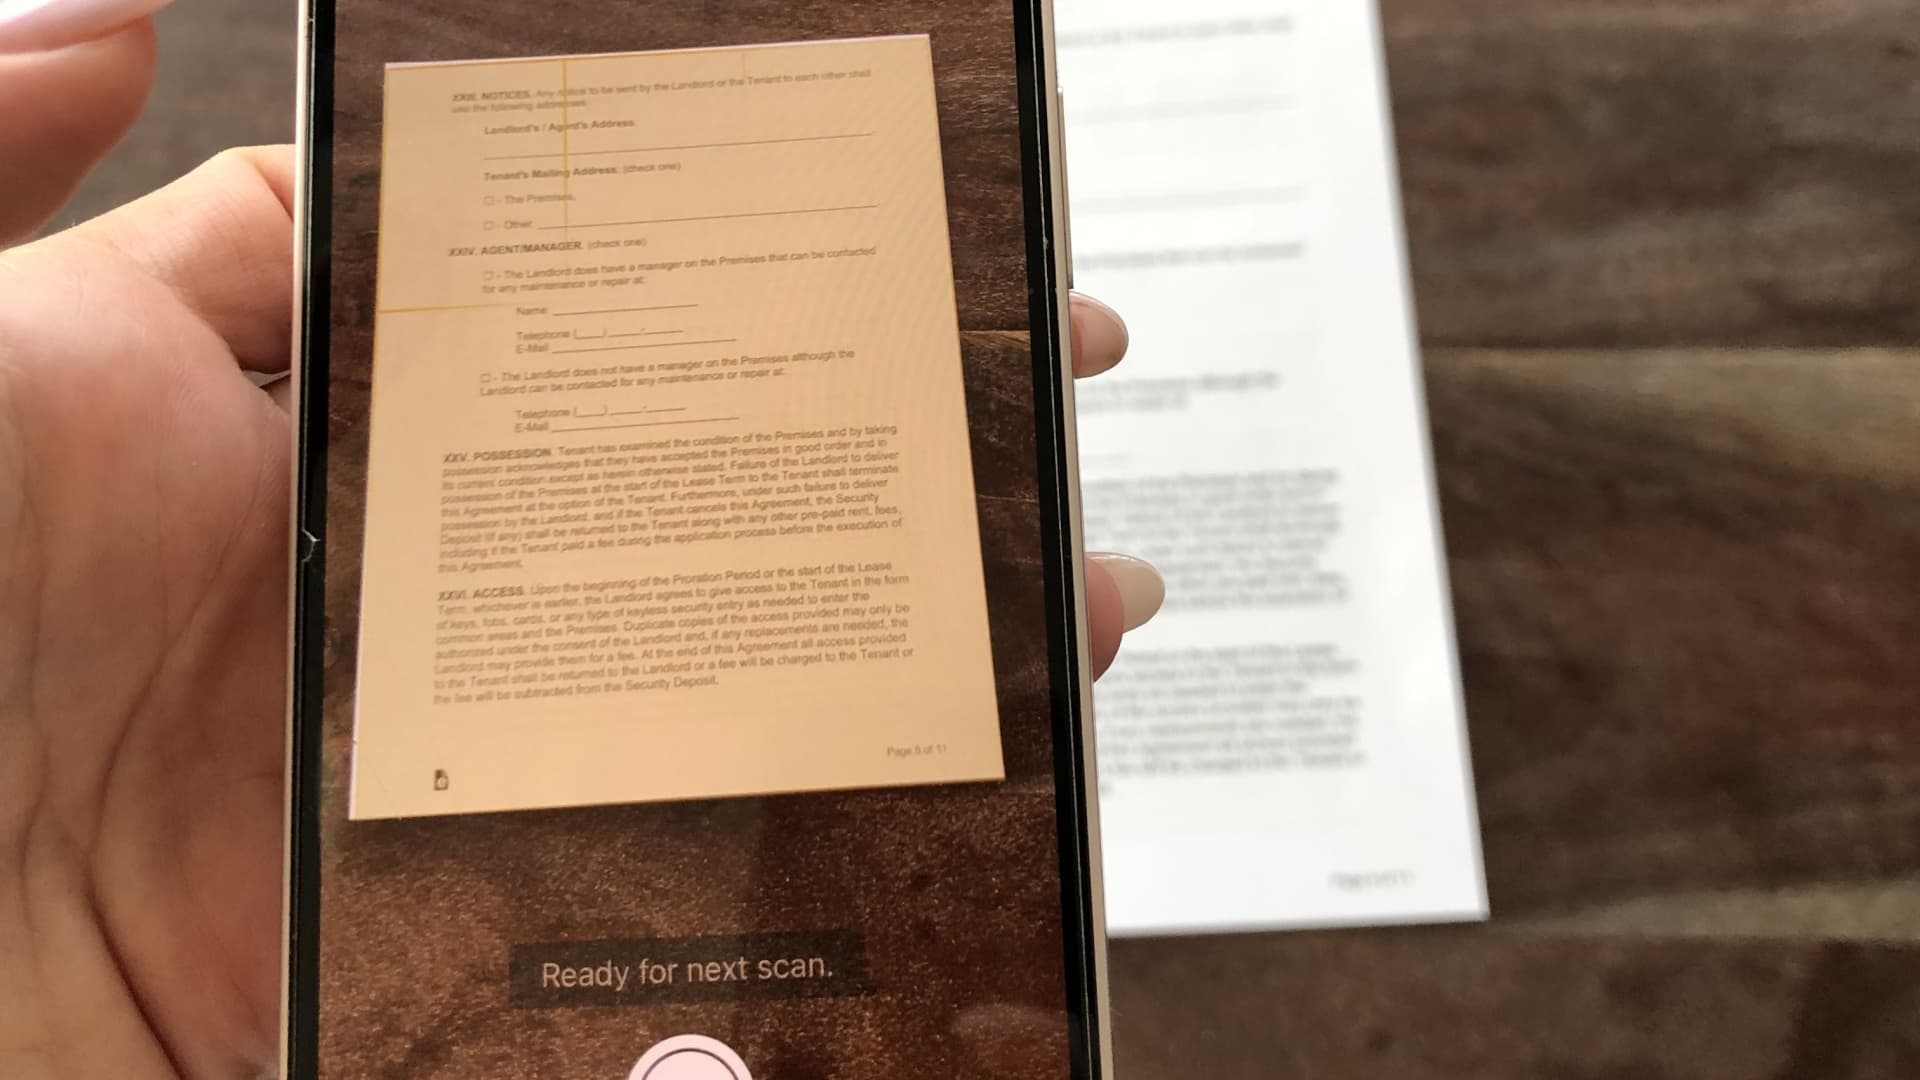
Tap on the” overlook Documents” option in the sub-menu. You’ll see a view of the live camera feed on your device and the app will display an unheroic box around any object that it recognizes as a document.
These boxes are the automatic document discovery point of the scanning app, which is designed to crop the edges of the document out of the frame so that unwanted background is barred and a advanced quality checkup can be performed.
In bus mode, the scanning app will automatically capture and reuse the document when it recognizes the document in the standpoint of the camera. When a checkup is successful, the app will display a temporary exercise of the scrutinised document in the nethermost right corner of the screen.However, you can tap the” regen” button in the exercise pane to attempt the checkup again, If you make a mistake during the scanning process.
Once you’re satisfied with the checkup, you can tap the” Keep overlook” button in the exercise pane. The app will reuse and save the checkup as a new image in the body of the note. In addition, the scanner will also show a small thumbnail of the checkup in the nethermost right corner of the screen, allowing you to fluently pierce the checkup in case you want to snappily partake it to another app or cancel it latterly. This process demonstrates using the scanner app’s automatic document discovery, how to manually capture a checkup, and finding and managing scrutinised documents after the original checkup.
UNDERSTANDING THE INTERFACE
To start a new checkup using your iPhone, first detect and open the Notes app. With the app open, start a new note by clicking the square and pencil icon in the nethermost right- hand corner. Once you’re inside a new note, click the camera icon just above the keyboard. This will open a window where you can choose between taking a new print or checkup using the iPhone’s camera, or choosing an being printed from your camera roll.
However, you will not see the camera icon, If you’re formerly inside a note and have the keyboard actuated. rather, you can pierce the option to start a new checkup by clicking” Done” in the top right corner. also the camera icon is available. As soon as you click the camera icon to start a checkup, your iPhone will open a new window where it’ll show you whatever the camera is pointing at.
In the case of the iPhone 6s( as used to produce this companion), the camera focuses automatically.However, it’ll display the instruction” move iPhone further down”, If it’s too close to the runner for the camera to be suitable tofocus.However, it’ll say” move iPhone closer, If it’s too far down.” If you have an aged iPhone, you may have to tap the button on the screen to take the print. But for newer models like the 6s, once the camera is deposited correctly, it’ll automatically capture the checkup and take you to the coming stage, where you can crop and edit the checkup.
CONFORMING SCAN SETTINGS
When viewing the camera feed in the” Scanner” app, a settings icon and a flash icon will appear. The settings icon will be deposited to the left wing of the flash icon and will be visible in the top right corner of the ”Scanner” app screen.
Tapping the settings icon will open a new screen where colorful checkup settings can be acclimated. The first settings option is the document type. A number of options will be available, similar as ” Automatic”, ” Color Document”,” Grayscale Document”,” Black & White Document”, and ” Photo”. The presently named document type will be indicated by a crack icon located to the right of the named option. Tapping an indispensable option will make it the active selection.
The alternate settings option is” overlook Quality”. This setting will determine the quality and performing train size of the scrutinised document. The available options will be” Fast”,” Medium”, and” Stylish”. The presently named checkup quality will be indicated by a crack icon located to the right of the named option. The third settings option is” overlook train Name”. This setting provides the inflexibility to choose the format of the train name for each scrutinised document.
By dereliction, the option will be set to” Ask Every Time”. Still, this can be changed to” Use Current Date”,” Use Custom Format” or” Use Document Name”. still, a textbook field will appear underneath to allow a custom train name to be entered, If the ultimate option is chosen. The final settings option is” Auto Scanning”. When the setting is enabled, the” Scanner” app will automatically take a print of the document when it recognizes the edges of the document in view of the camera. The dereliction option will be “Bus Scanning is Off”. still, the setting can be changed to” Auto Scanning is On”. No other options will be available. Flash back to valve the” Back” option located in the top left corner of the screen to save and exit the settings screen when necessary.
ENSURING SUFFICIENT STORAGE SPACE

Still, the device may not be suitable to store your reviews if there isn’t enough storage space on your iPhone.
To check storehouse space, valve” Settings” and also valve” General.” Next, valve” iPhone Storage.” A list of apps on your iPhone and the quantum of storehouse space each uses will be displayed. You should see the scanning listed. However, you may see a communication that the storehouse is nearly full, If there isn’t enough available space. In that case, you must remove some lines from the storehouse. There are many different strategies that you can use to free up storehouse space. One common way is to remove apps that you no longer use. Tap and hold any app icon on the home screen until the app icons start to twitch. Tap the X in the corner of the app icon that you want to cancel. Tap “cancel” in the evidence pop- up window. You can also cancel music, pictures, and prints that you no longer want to keep on theiPhone.
However, you can remove individual particulars or use a different system to remove all downloaded content from the music library, If you have downloaded music or pictures to the iPhone from the iTunes Store.