Becoming a professional gaming YouTuber is a long road, but you have to start somewhere. The first step is to learn how to record games on your computer.
Although professional streamers and YouTubers have high-tech setups, you can start with just a simple computer and screen recording software.
In this article, we will discuss a game screen recorder known as DemoCreator. Whichever game you want to record, DemoCreator should be your go-to.
System Requirements for DemoCreator and Gameplay Recording
Your game and recording software heavily rely on the CPU and the GPU. If the CPU is not capable enough, you will experience a significant drop in performance, such as framerate drops, freezes, and crashes. This may render your recorded footage useless.
So, we recommend that you upgrade your PC if its performance is not up to your needs. However, if you wish to remain with your current system, what you can do is, adjust your game and recording settings.
DemoCreator supports 64-bit OS and requires an Intel i3 or a better multicore processor, 2GHz or above. Furthermore, a 3GB physical RAM (8GB for HD and 4K videos) is ideal for DemoCreator.
How to Record PC Game Footage using DemoCreator?
As a beginner, using DemoCreator, can be very simple. We will introduce you to DemoCreator and provide a step-by-step guide on how to record gaming footage.
A Brief Introduction
DemoCreator is a screen recording software created by Wondershare. It is compatible with Windows as well as macOS. Furthermore, it is an excellent tool for capturing videos and then editing them immediately.
The best part about DemoCreator is that it allows you to upload your videos directly to YouTube, saving you a lot of hassle and time.
Step-by-Step Guide of Recording Game Footage on DemoCreator
Now that we have briefly introduced DemoCreator, let’s get into the details of capturing footage.
Step 1: Download DemoCreator.
Go to the official website of Wondershare DemoCreator and download it for free. It is compatible with Windows 10, Windows 8, and Windows 7, and macOS v11(Big Sur),macOS v10.15(Catalina), macOS v10.14(Mojave), macOS v10.13 (High Sierra).

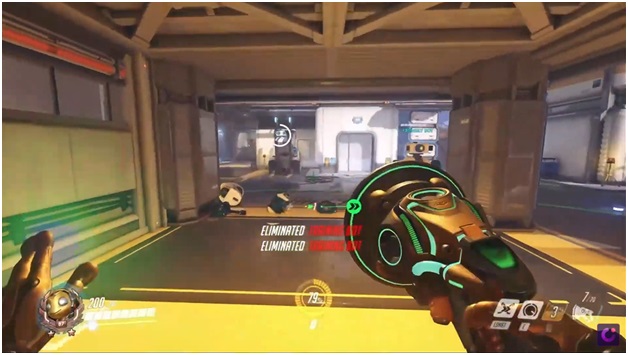
Step 2: Launch the Game.
While DemoCreator downloads, launch the game you want to record. Make sure your game’s visual settings are adjusted.
Step 3: Open DemoCreator.
Once the software is downloaded, click on the desktop icon to open it.
Step 4: Select “Record Game”.
A pop-up window will appear where you will have different options. In order to record your PC game, click on “Record Game.”

Step 5: Adjust the Settings.
In this step, you have to select the game that you are going to record. Then set the frame rate that your computer is capable of handling.
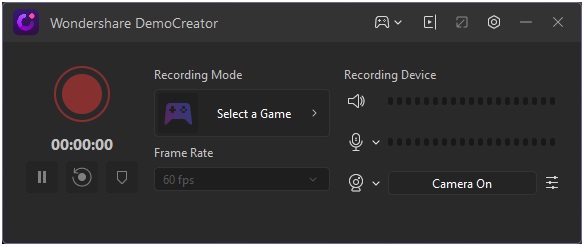
Lastly, adjust the settings of your recording devices, such as the microphone you will use or whether you want the webcam to be on or off.
Popular games that you can record using DemoCreator are Fortnite, League of Legends, Minecraft, Among Us, Call of Duty, and many more.
Step 6: Start Recording.
Once you have adjusted the settings, press the red button to start recording.
To end the recording, press F10.
Editing Options for Game Recording with DemoCreator
Once you end the recording, you will automatically enter into the video editing interface. Like we mentioned before, DemoCreator provides many attractive editing options to enhance your captured gameplay.
A few ways of editing your captured footage are as follows.
Adding Some Game Related Motion Stickers
In the video editing interface, on the left, you will see an icon labeled “Sticker.” You can use this to add game-related motion stickers. To add the sticker, drag and drop it on the video.
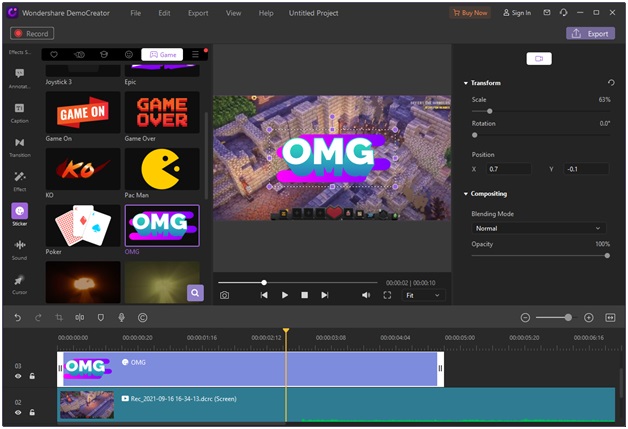
This can pique the interest of your viewers and add some extra color to your captured gameplay.
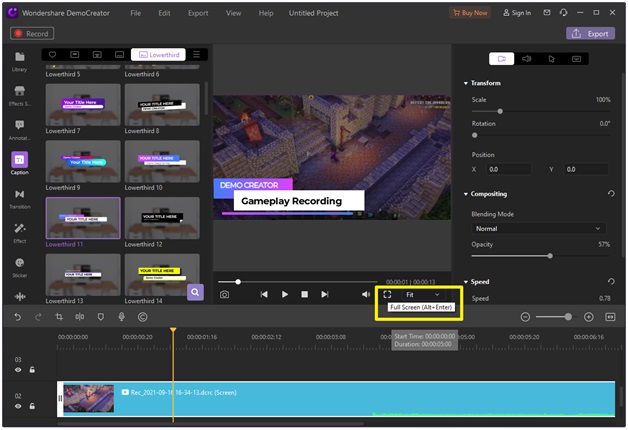
Creating an Attractive Video Thumbnail with DemoCreator
Another method of capturing your audience is by creating an attractive video thumbnail. Thumbnails are usually the first impression a viewer will have of your video. It is a major deciding factor for a person whether they will watch the video or not.
Thus, it is crucial that you design a fun and encapsulating thumbnail.
You can choose a major suspenseful moment as the background for your thumbnail and then add different caption stickers and text in DemoCreator.DemoCreator provide a Full Screen capture feature in the software. You can use DemoCreator’s attractive resources to make your thumbnail without other image tools.
Adding Cursor Effects:
Next, we have cursor effects. Most games have a lot of mouse movements, and it could be a little hard to keep up with where the YouTuber is clicking.
So, to ensure that your audience can follow your cursor movements, you can add different cursor effects that DemoCreator provides.
DemoCreator provides us with five cursor effects: Cursor Highlight, Cursor Spotlight, Cursor Magnify, Click Rings, and Click Sound.
Cursor Highlight:
This effect highlights the cursor and forms a colored circle around the cursor. You can show where a character in your game is going or which item you are clicking on.
Cursor Spotlight:
The Cursor Spotlight effect lets you form a spotlight around the cursor. If you want to point something out for your viewers, you can use this effect to highlight it for them.
Cursor Magnify:
This effect lets you magnify your cursor so that it is visible to the viewers. You can use this effect to show your viewers small words or text written in your game.
Click Rings:
This effect causes rings to be formed by the cursor. When you click on something, the circular ring will show the audience where you have clicked.
Click Sound:
This effect is used to add click sounds. You can use this to make sure that the viewer can keep track of your clicks.
So, these are a few cursor effects that you can use by scrolling down the Effects panel.
To add these effects to your videos, simply drag and drop the effect on the video track. Further settings will open up on the right in the Editing panel, where you can adjust them according to your preferences.
Adding Transition Effects:
In most games, you move from one interface to another. To add some fun to it, DemoCreator offers different transition effects. You can add them to your captured gameplay so that different interfaces can transition in different manners.
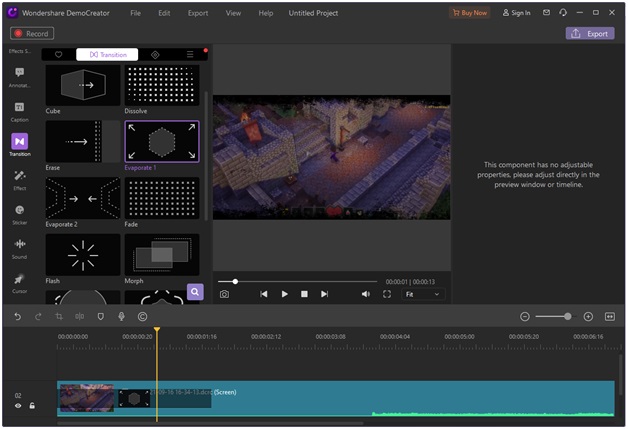
These are some of the built-in transition effects. Add them to your video at different points by dragging and dropping them to the track.
The four editing options mentioned above will surely take your recording level from an amateur to a pro. So, do try them out!
Conclusion
Becoming a successful game streamer or YouTuber will surely be a long journey, but it certainly won’t be hard if you have the right tools by your side. Wondershare DemoCreator will make your journey easier with its variety of effects and efficiency.
Lastly, perfection only comes with practice so keep experimenting with different tools and techniques, and indeed, one day, you will become a top-notch YouTuber. Good luck!